The fitness world has seen its fair share of viral trends, from the plank challenge to the 5×30 meme, but few have captured the attention of trainers and everyday gym-goers quite like the plank hover. This deceptively simple exercise has been hailed as even more effective than the traditional plank for building core strength, stability, and endurance. Social media platforms like TikTok and Instagram have propelled the hover into the spotlight, with fitness influencers and celebrities alike demonstrating its benefits. But is this viral workout trick genuinely superior, or is it just another fleeting fad? In this comprehensive guide, we will explore everything you need to know about the plank hover, from its origins and scientific backing to proper form, common mistakes, variations, and how to progress. Whether you are a fitness novice or a seasoned athlete, understanding the plank hover can transform your core training and elevate your overall performance.
What Is a Plank Hover?
A plank hover, sometimes referred to as a hover hold or a forearm hover, is a dynamic variation of the traditional forearm plank. Instead of holding a static position on your forearms and toes, the hover involves lowering your body toward the floor and then pressing back up, all while maintaining a rigid, straight line from head to heels. This movement adds an element of instability and time under tension that challenges the core in ways a standard plank cannot. According to fitness experts, the plank hover is essentially a plank that has been upgraded with movement, forcing the deep abdominal muscles, shoulders, and hips to work harder to stabilise the spine.
The term “hover” is sometimes used interchangeably with “forearm plank,” but there is a subtle distinction. In a hover, the body is held slightly off the floor in a long, straight line, emphasising anti-extension the core’s ability to resist sagging or arching. This makes it a favourite among Pilates and barre instructors who prioritise functional core strength over repetitive spinal flexion. Unlike crunches or sit-ups, which involve bending the spine, the plank hover keeps the spine in a neutral position, reducing the risk of intervertebral pressure and long-term wear and tear.
The rise of the plank hover as a viral workout trick can be traced to its accessibility and effectiveness. It requires no equipment, can be performed anywhere, and suits all fitness levels with appropriate modifications. As social media users shared their transformations and personal records, the exercise gained momentum, with some reports suggesting a staggering 967% increase in interest in 2026. This surge in popularity has prompted fitness professionals to examine the hover more closely, leading to a wealth of research and expert recommendations.
Why the Plank Hover Went Viral
The plank hover’s viral status is not merely a product of social media hype; it is rooted in its tangible benefits and the way it addresses common fitness pain points. Here are several reasons why this exercise captured the internet’s imagination:
A. Accessibility for All Fitness Levels
One of the primary reasons for the hover’s viral success is its scalability. Beginners can start with a modified version, such as a knee hover, while advanced athletes can incorporate dynamic movements like shoulder taps or leg lifts. This inclusivity means that almost anyone can participate and see progress, which is a powerful motivator for sharing results online.
B. Joint-Friendly Alternative to Crunches
Traditional ab exercises like crunches and sit-ups involve repeated spinal flexion, which can exacerbate back pain and lead to long-term spinal issues. The plank hover, by contrast, keeps the spine neutral and engages the core isometrically, making it a safer option for individuals with sensitive backs. This joint-friendly approach has resonated with a generation increasingly concerned with longevity and injury prevention.
C. Time-Efficient and Equipment-Free
In a world where time is a precious commodity, the plank hover offers a highly efficient workout. A few minutes of focused hovering can deliver significant core activation, and no gym membership or fancy equipment is required. This convenience made it a natural fit for the home-workout boom and the “5-minute fitness” trends that dominate platforms like TikTok.
D. Visible Results and Social Proof
Social media thrives on transformation stories. Fitness influencers and everyday users alike have documented their plank hover journeys, sharing before-and-after photos and personal bests. The visual nature of these results—sculpted abs, improved posture, and reduced back pain creates a compelling narrative that encourages others to try the exercise.
E. Scientific Validation
While the viral spread of the plank hover was largely organic, it gained further credibility when fitness scientists began publishing research on its effectiveness. Studies comparing muscle activation during hovers and traditional planks found that the hover elicits superior activation of the core muscles, including the rectus abdominis, external obliques, erector spinae, and glute max. This scientific backing transformed the hover from a mere social media challenge into a legitimate training tool.
The Science Behind the Plank Hover
Understanding why the plank hover works requires a basic grasp of core anatomy and muscle activation. The core is not just the “six-pack” muscle (rectus abdominis); it is a complex network of muscles that wrap around the torso, including the transverse abdominis, internal and external obliques, erector spinae, and the glutes. These muscles work together to stabilise the spine, transfer force between the upper and lower body, and maintain proper posture.
Electromyography (EMG) Studies
Electromyography (EMG) is a technique used to measure electrical activity in muscles. In a landmark study conducted by Dr. Jinger Gottschall and her team at Penn State University, researchers compared the muscle activation of various abdominal exercises, including crunches, oblique twists, and the hover. The results were striking: the hover produced a 27% increase in rectus abdominis and external oblique activity compared to the traditional crunch. This increased activation is attributed to the integrated nature of the hover, which recruits not only the core but also the shoulders, hips, and lower body to maintain stability.
The Role of Leverage
The biomechanics of the hover explain its intensity. In a hover, you are resting on your elbows, which lengthens the lever formed by your trunk and legs. This longer lever increases the gravitational pull on the abdominal muscles, forcing them to work harder to keep the body parallel to the ground. In contrast, a high plank on the hands shortens the lever slightly, making it marginally easier. This principle of leverage is why the hover is often described as a more advanced and effective core exercise.
Anti-Extension and Anti-Rotation
The plank hover primarily trains the core in an anti-extension capacity, meaning the muscles must resist the tendency of the lower back to arch. This is crucial for daily activities and athletic performance, where a stable, neutral spine is essential for safe lifting, running, and jumping. Additionally, many hover variations incorporate anti-rotation challenges such as lifting one arm or leg which further enhance core stability and functional strength.
Impact on Respiratory Function
Emerging research suggests that core training with exercises like the plank hover may also improve respiratory function. A 2024 study published in the European Journal of Sports Science found that enhanced core stability contributed to better breathing mechanics, likely because the diaphragm and abdominal muscles work in coordination. This is particularly beneficial for athletes and individuals with respiratory conditions.
How to Perform a Plank Hover with Perfect Form
Mastering the plank hover begins with proper setup and technique. Poor form not only diminishes the exercise’s effectiveness but also increases the risk of injury. Follow these step-by-step instructions to ensure you get the most out of every hover.
A. Setup and Alignment
-
Begin on all fours on a comfortable exercise mat. Your wrists should be directly under your shoulders, and your knees under your hips.
-
Lower your forearms to the floor, keeping them parallel to each other and shoulder-width apart. Your elbows should be directly beneath your shoulders.
-
Extend your legs behind you, resting on your toes. Your body should form a straight line from your head to your heels. If this is too challenging, drop your knees to the floor while maintaining a straight line from head to knees.
B. Core Engagement
-
Brace your abdominal muscles as if you are about to be punched in the stomach. Imagine drawing your belly button toward your spine.
-
Squeeze your glutes to help stabilise your pelvis and protect your lower back.
-
Keep your neck in a neutral position. Your gaze should be directed toward your thumbs, not down the length of your body or up at the ceiling.
C. Executing the Hover
-
Press your forearms into the floor to prevent your shoulder blades from “chicken wing-ing” out. However, avoid pushing so hard that you excessively curve your upper spine.
-
Hold the position for a predetermined time, typically starting with 20–40 seconds. Breathe steadily and avoid holding your breath.
-
For a dynamic hover, slowly lower your body toward the floor until you are just an inch or two above the ground, then press back up to the starting position. This adds a movement component that further challenges the core.
D. Breathing Technique
Proper breathing is often overlooked but is essential for maximizing the benefits of the plank hover. Holding your breath increases blood pressure and pressure on the pelvic floor. Instead, aim for steady, controlled breathing throughout the hold. Inhale deeply through your nose, allowing your ribcage to expand, and exhale slowly through your mouth.
Common Mistakes to Avoid
Even with the best intentions, many people make errors that compromise the effectiveness of the plank hover. Being aware of these common mistakes can help you correct your form and avoid injury.
A. Sagging or Piking Hips
The most frequent mistake is allowing the hips to sag toward the floor or pike up toward the ceiling. Sagging hips indicate that the core muscles have fatigued and are no longer able to support the spine, putting strain on the lower back. Piking the hips shifts the workload away from the core and reduces the exercise’s intensity. To correct this, constantly check your alignment: your shoulders, hips, and heels should form a straight line.
B. Arching the Lower Back
Arching the lower back is a sign that the abdominal muscles are not engaged sufficiently. This position places excessive pressure on the lumbar spine and can lead to pain. Focus on bracing your abs and tucking your pelvis slightly under to maintain a neutral spine.
C. “Lazy Legs”
Many people forget to engage their lower body during a plank hover. The quadriceps, glutes, and calves play a crucial role in stabilising the body. Actively squeeze your quads and glutes to take some of the load off your core and maintain a rigid line.
D. Holding the Breath
As mentioned earlier, holding your breath during a hover is counterproductive. It increases intra-abdominal pressure and can cause dizziness or elevated blood pressure. Remember to breathe steadily and rhythmically.
E. Looking Up or Down
Your neck should remain in a neutral position, aligned with your spine. Looking up can strain the cervical spine, while looking down can cause the head to hang, disrupting the alignment of the entire body. Keep your gaze directed at your thumbs or slightly ahead on the floor.
Variations and Modifications
The plank hover can be adapted to suit any fitness level. Here are some popular variations, ordered alphabetically for clarity.
A. Bear Plank Hover
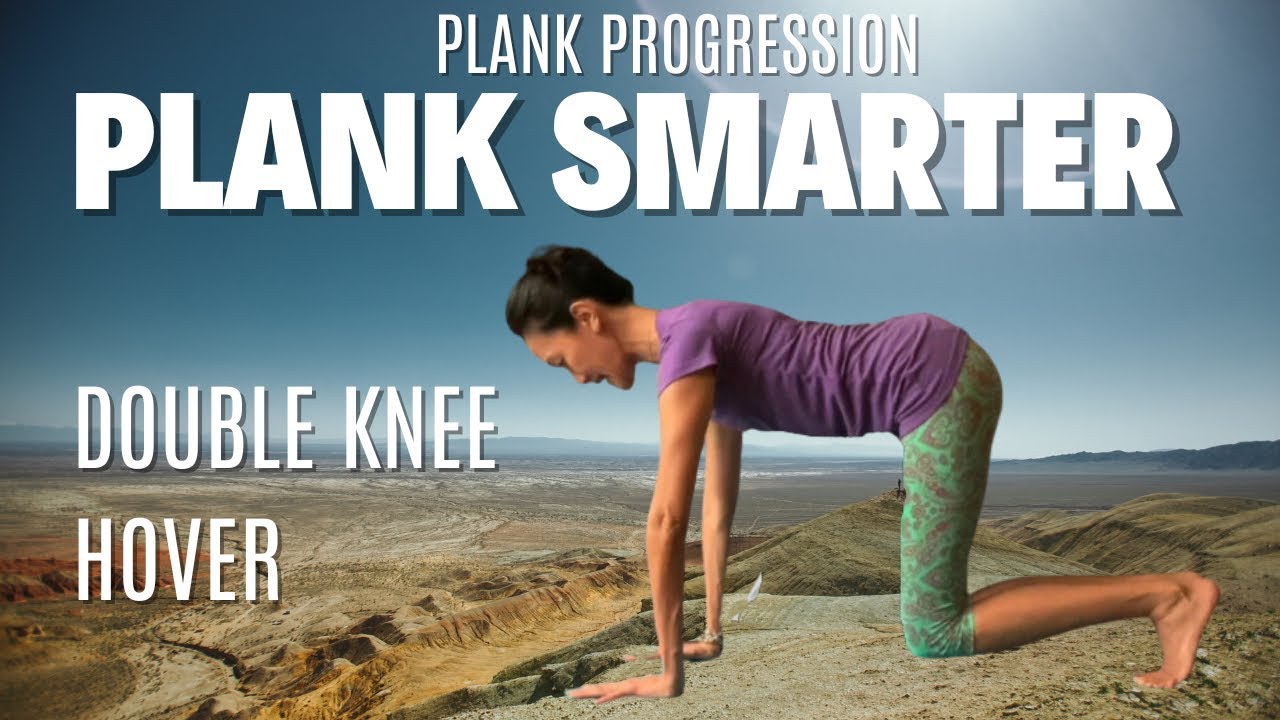
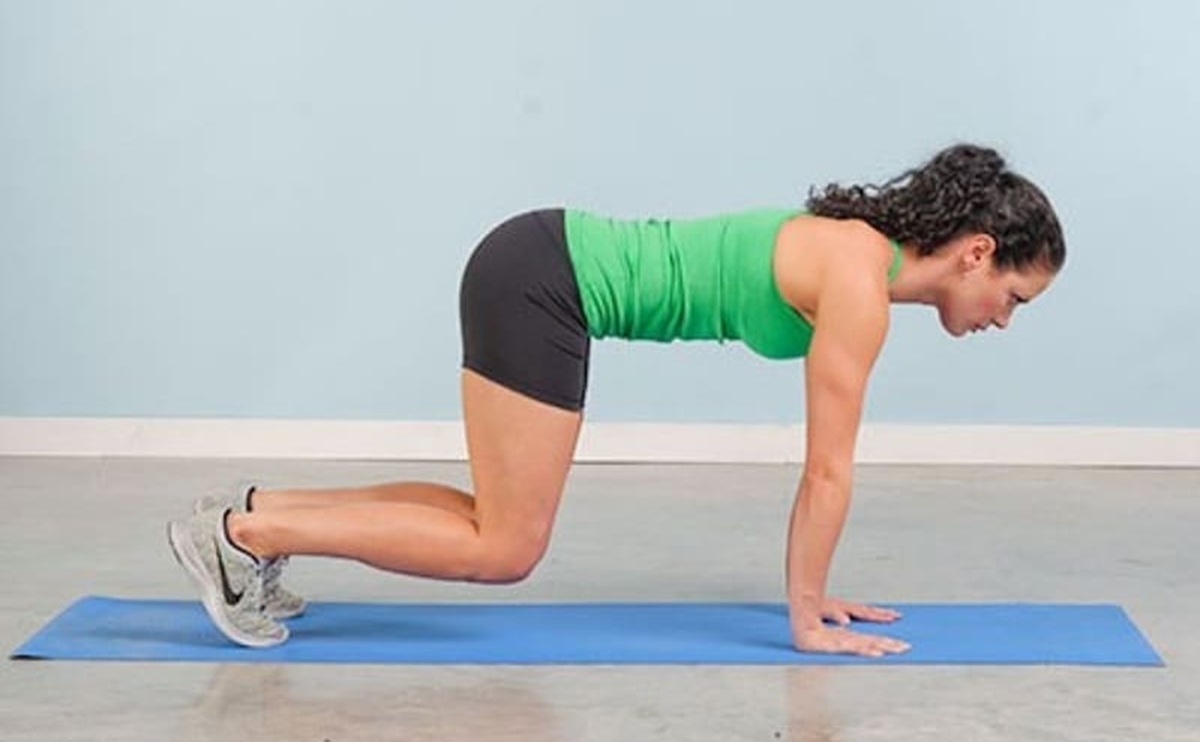
Begin in a tabletop position with your knees under your hips and hands under your shoulders. Lift your knees one or two inches off the floor, hovering them just above the ground. This variation is excellent for beginners and targets the deep core without the demand of a full hover.
B. Dynamic Hover with Knee Taps
From a forearm hover, slowly lower one knee to tap the floor, then return to the hover position. Alternate legs. This variation adds a dynamic element that challenges balance and coordination.
C. Hover with Shoulder Taps
In a high plank position, lift one hand to tap the opposite shoulder, then return it to the floor. Alternate sides. This variation increases the anti-rotation demand on the core and engages the shoulders.
D. Modified Knee Hover
Perform the hover with your knees resting on the floor instead of your toes. This reduces the load on the core while still allowing you to practice proper alignment and bracing.
E. Plank Hip Dips
From a forearm hover, rotate your hips to one side, lowering them toward the floor, then return to centre and repeat on the other side. This variation targets the obliques and adds a rotational component.
F. Side Plank Hover
Lie on your side with your forearm on the floor, elbow under your shoulder. Lift your hips off the floor, forming a straight line from head to feet. Hold, then lower. This variation emphasises the lateral core muscles.
G. Weighted Hover
Once you can hold a basic hover for 45–60 seconds, place a weight plate on your upper back (have a partner help you) to increase the resistance. This advanced variation builds exceptional core strength.
Progressions and Advanced Challenges
/Verywell-11-3567193-Plank-679-74ff050ef03e477bab8e4317010f77f3.jpg)
As you become stronger, you can progress the plank hover to keep challenging your muscles and preventing plateaus. Here are some advanced techniques.
A. Extended Hold Times
Gradually increase the duration of your hover holds. Start with 20 seconds, then work your way up to 60 seconds or more. Aim to maintain perfect form throughout; if your form deteriorates, stop and rest.
B. Adding Resistance
Use a weighted vest or a plate on your back to add load to the hover. This increases the demand on the core and accelerates strength gains.
C. Incorporating Unstable Surfaces
Perform the hover with your forearms on a stability ball or a Bosu ball. The instability forces your core to work even harder to maintain balance, enhancing proprioception and functional strength.
D. Combining with Other Exercises
Create a circuit that alternates the hover with other core exercises, such as hollow body holds, leg raises, or Russian twists. This keeps your workout varied and challenges your core from multiple angles.
E. Plyometric Hover
For advanced athletes, a plyometric hover involves explosively pushing off the floor from a hover position into a high plank, then landing softly back into the hover. This dynamic movement builds power in addition to strength.
Benefits of the Plank Hover
The plank hover offers a multitude of benefits that extend far beyond a sculpted midsection. Regular practice can transform your physical performance and overall quality of life.
A. Improved Core Strength and Stability
The primary benefit of the plank hover is enhanced core strength. By targeting the rectus abdominis, transverse abdominis, obliques, and erector spinae, the hover builds a solid foundation for all movement. A strong core improves posture, reduces the risk of injury, and enhances athletic performance in virtually every sport.
B. Better Posture and Spinal Health
The anti-extension nature of the hover trains the core to support the spine in a neutral position, counteracting the slouching and forward-head posture that is common in desk-bound individuals. This can alleviate back pain and reduce the likelihood of developing chronic spinal issues.
C. Enhanced Respiratory Function
As mentioned, core stability is closely linked to breathing mechanics. A strong core supports the diaphragm, allowing for more efficient respiration. This can improve endurance during cardiovascular exercise and even enhance vocal performance.
D. Increased Shoulder and Upper Body Strength
The hover is not just a core exercise; it also engages the shoulders, triceps, and upper back. Holding the position requires isometric strength in the arms and shoulders, making it a valuable addition to any upper-body workout.
E. Greater Mind-Muscle Connection
Performing the plank hover requires focus and body awareness. You must consciously engage your core, glutes, and quads while maintaining alignment. This mind-muscle connection carries over to other exercises, improving your ability to activate the right muscles and avoid compensation patterns.
F. Time Efficiency and Convenience
A few minutes of plank hover practice can deliver a comprehensive core workout, making it an ideal choice for busy individuals. It requires no equipment and can be done anywhere, making it a truly accessible form of exercise.
Plank Hover for Rehabilitation
The plank hover has found a place in physical therapy and rehabilitation settings, particularly for individuals recovering from low back pain. Research indicates that the plank exercise can contribute to spinal stabilisation and pain reduction in individuals with chronic low back pain. Physical therapists often prescribe a modified hover such as a knee hover or a bear plank to help patients safely strengthen their core without aggravating their condition.
However, it is crucial to approach the plank hover with caution if you have an existing back injury. Always consult with a healthcare professional before starting any new exercise programme, and prioritise proper form over duration or intensity.
Integrating the Plank Hover into Your Routine
To reap the benefits of the plank hover, consistency is key. Here are some practical tips for incorporating it into your fitness regimen.
A. Start with Short Holds
Begin with 15–20 second holds and gradually increase the duration as your strength improves. Aim for 3–4 sets per session, with 30–60 seconds of rest between sets.
B. Schedule It Regularly
Incorporate the hover into your warm-up or cool-down routine, or dedicate a separate core session two to three times per week. Consistency over time is more important than occasional intense efforts.
C. Combine with Other Core Exercises
While the hover is excellent on its own, a well-rounded core programme should include a variety of movements. Pair the hover with exercises that target different aspects of core function, such as rotational movements, anti-lateral flexion, and hip flexion.
D. Listen to Your Body
If you experience pain particularly in your lower back stop immediately and reassess your form. Pain is a signal that something is wrong, and pushing through it can lead to injury.
E. Track Your Progress
Keep a log of your hold times, sets, and variations. Seeing your progress over time can be highly motivating and helps you identify areas for improvement.
Conclusion
The plank hover has rightfully earned its status as a viral workout trick. Backed by science and embraced by fitness enthusiasts worldwide, it offers a time-efficient, equipment-free way to build core strength, stability, and endurance. By understanding the proper form, avoiding common mistakes, and progressively challenging yourself, you can harness the full potential of this remarkable exercise. Whether you are a beginner looking to improve your posture or an athlete seeking to enhance performance, the plank hover is a valuable addition to your training arsenal.